
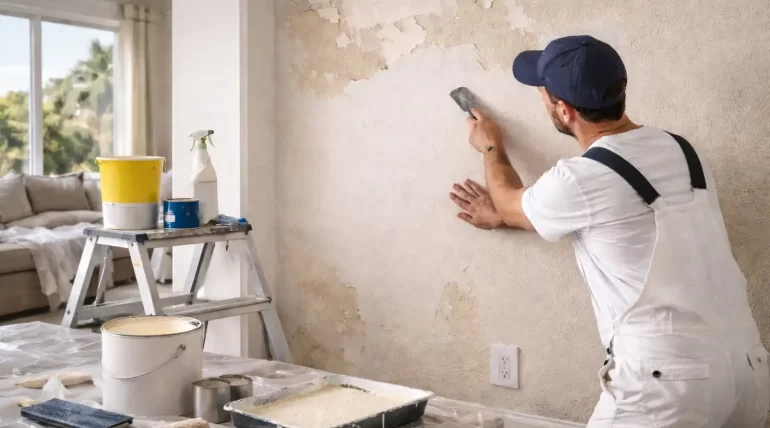
A room can have the perfect paint colour and still look a little off once the job is finished. That’s one of the challenges with Interior Room Painting, especially when your walls have different textures. You might notice pale patches near the ceiling, uneven colour around a feature wall or tiny shadows that weren’t obvious before. Often, the problem comes down to the wall itself.
I’ve found that wall texture deserves more attention than it usually gets during a painting project. Smooth plaster, older plasterwork and heavily textured surfaces all behave differently when you apply paint. A roller that glides across one wall might leave uncovered spots on another, even when you’re using the same paint.
When planning Interior Room Painting, take a closer look at the surfaces before choosing your tools. The right approach to Interior Room Painting depends on the texture, existing coating and light in each room. These details can influence the final result just as much as the colour you pick, whether you’re refreshing a Sydney apartment or updating an older family home.
Why the Same Paint Can Look Different on Two Walls
Imagine you’ve painted your living room in a warm white. The smooth wall beside the window looks bright and clean, but the textured wall opposite it appears slightly darker. You haven’t necessarily made a mistake.
Raised areas catch the light differently from the grooves around them. Those small shadows can change how your eyes read the colour, particularly when sunlight comes through a window at an angle. Sydney homes with large windows can make this effect especially noticeable during the afternoon.
Texture also affects coverage. A rough wall has more surface area than a flat one, so the paint needs to cover more than you might expect from its measurements alone. Deep grooves can be particularly frustrating because the roller may coat the raised sections while leaving thinner coverage in the recesses.
That’s why I wouldn’t start painting every wall in exactly the same way. First, work out what you’re dealing with. Then choose your preparation method, roller and paint accordingly.
1. Work Out What Kind of Wall You’re Painting
Before starting an Interior Room Painting project, take a few minutes to inspect the walls in each room. You don’t need specialist equipment for this. Good lighting and a close look will tell you quite a bit about the surface. Run your hand gently over the wall and check whether it feels smooth, slightly uneven or noticeably rough.
Smooth plasterboard is common in newer homes and apartments. Its surface is usually even, although joins, dents and old repair marks can show through once the paint dries.
Lightly textured walls have a fine, uneven pattern. The surface might look almost smooth from across the room but feel slightly rough when you run your hand over it.
Heavily textured plaster or render has more pronounced ridges and grooves. These walls can take longer to cover because paint needs to reach the recessed areas as well as the raised sections.
Decorative wall finishes require a little more investigation. Some feature walls use specialist coatings that can react differently to ordinary interior paint. Check the existing finish and the new paint manufacturer’s instructions before proceeding.
I also look for flaking paint, cracks, stains and signs of moisture. These issues need attention before painting. Otherwise, you could spend an afternoon making a wall look beautiful only to see the same problem return later.
2. Don’t Rush the Preparation
Good preparation makes a noticeable difference to Interior Room Painting, particularly when you’re dealing with textured walls. It’s tempting to jump straight into painting once you’ve chosen a colour, but a little groundwork now can save you from patchy coverage and unnecessary touch-ups later.
Start by removing dust and everyday grime. Pay particular attention to kitchens, hallways and the areas around light switches, where fingerprints and grease tend to accumulate. Use a suitable cleaner and let the wall dry completely.
Next, inspect the surface at eye level and from the side. Small cracks, nail holes and dents can become much more obvious after you apply fresh paint. Fill damaged areas with an appropriate filler, let it dry and sand the repair gently.
Textured walls need a bit of restraint during sanding. If you flatten the surrounding surface while smoothing a repair, the patch may stand out even more than the original damage. For extensive damage, consider getting advice from a professional who understands the particular wall finish.
Older homes need extra care. Before scraping or sanding old paint, check the NSW Government’s guidance on lead-based paint. Some older coatings contain lead, so suspected lead paint should not be disturbed without appropriate precautions.
Is Primer Always Necessary?
Not necessarily. A previously painted wall in good condition may only need cleaning and minor preparation before you apply a compatible topcoat.
Primer becomes more important when you’re working with new plasterboard, bare patches, certain stains or repairs that absorb paint differently from the surrounding wall. It can also help when the existing surface requires a particular bonding system.
Don’t assume one primer suits every situation. Check the product instructions and make sure the primer works with both the existing coating and the paint you plan to use.
3. Get the Roller Nap Right
Choosing the right roller is one of those small decisions that can make Interior Room Painting much easier. Roller covers come with different nap lengths, which describe the thickness of their fibres. Shorter fibres generally suit smoother walls, while longer fibres help carry paint into rougher surfaces and deeper grooves.
Here’s a practical starting point:
| Wall surface | Roller to consider | Main consideration |
| Smooth plasterboard | Short nap | Keep the finish even and minimise roller marks. |
| Light texture | Medium nap | Cover the raised areas and shallow grooves. |
| Deep texture | Long nap | Reach the recessed sections without overloading the wall. |
| Corners and narrow edges | Angled brush | Work paint into areas the roller cannot reach. |
These recommendations aren’t universal. A lightly textured wall may need a different roller from a heavily stippled surface, and the paint manufacturer may recommend a particular cover.
One problem I would watch for is the temptation to press harder when the roller starts running low on paint. That often leaves streaks or patchy coverage. Reload the roller instead and keep your pressure steady.
On a deeply textured wall, check the grooves as you work. If the roller isn’t reaching them, a suitable brush may help with those stubborn sections. It’s slower than rolling the entire wall, but it can prevent an obvious difference once everything dries.
4. Choose a Finish That Suits the Surface
During Interior Room Painting, the paint finish deserves as much thought as the colour itself. Sheen affects how much light reflects off the wall, how noticeable small imperfections become and how the room looks throughout the day. The best choice depends on the surface and how you use the space.
Matte paint creates a softer look and generally reflects less light. That can help disguise minor surface imperfections, making it a popular choice for bedrooms and relaxed living spaces. Washability varies, though, so check the product specifications before using it in a high-traffic area.
Low-sheen paint offers a little more reflection while maintaining a relatively understated appearance. It can suit living rooms, hallways and family areas where you want a balance between style and everyday practicality.
Satin and semi-gloss finishes reflect more light. They’re often useful for selected trims, doors and other surfaces that need regular cleaning. On uneven walls, however, that extra reflection can make bumps and ridges more noticeable.
If you’re unsure, test the paint on the actual wall rather than relying on a colour card. Look at the sample in the morning, during the afternoon and under your usual evening lights.
A warm white might appear crisp beside a large window but take on a creamier tone after sunset. Deep green or charcoal can look dramatic on a feature wall, although the texture may make the colour appear darker in certain areas.
5. Make Different Wall Textures Work Together
Not every wall in your home needs to look identical. In fact, a little variation can give a room more character.
Consider an open-plan living and dining area. The living room might have smooth plaster walls, while the dining area has a subtle textured finish. Painting both areas in the same warm neutral can create a consistent look without removing the character of either surface.
If you want something more noticeable, use the textured wall as a feature. A muted green behind a timber dining table or a deeper beige behind the sofa can add depth without overwhelming the room.
For a contemporary Sydney home, I’d consider combinations such as:
- Warm white walls with timber furniture and natural linen.
- Soft greige paired with black accents and simple modern fittings.
- Sandy neutrals with muted green details for a relaxed coastal feel.
The lighting matters here, too. Before committing to a feature colour, check how it looks against the adjoining walls and furniture. A shade that works beautifully in isolation might feel too dark when you see it across an entire wall.
You don’t need a different colour in every room to make your home interesting. Sometimes, the contrast between smooth and textured surfaces provides enough visual variety on its own.
6. Apply the Paint Without Leaving Uneven Patches
Once the preparation is complete, the focus shifts to applying the paint evenly. With Interior Room Painting, textured walls need particular attention because the roller must cover both the raised areas and the grooves without leaving heavy paint deposits in either spot.
Start by painting around ceilings, corners, skirting boards and window frames with a suitable brush. Then use the roller on the larger areas, working in sections you can manage comfortably.
Overlap your strokes slightly so the sections blend together. Avoid pressing excessively hard or spreading paint too thinly just to cover more area. If the wall is rough, check that the paint reaches the recessed sections without building up too heavily on the raised parts.
Drying time deserves attention as well. Follow the manufacturer’s instructions between coats, even if the wall looks dry at a glance. Temperature, humidity and ventilation can all affect drying.
Two coats often produce more consistent coverage than one, especially when changing colours. However, the actual number depends on the paint, the existing surface and the manufacturer’s guidance.
When the paint has dried, look at the wall from different angles. Stand near a window or switch on the room’s usual lighting. You may spot thin patches or roller marks that weren’t visible while the surface was wet.
Don’t immediately add another coat to every area you question. First, check whether the paint has dried fully and whether the difference comes from the texture or from genuinely uneven coverage.
7. Avoid the Mistakes That Cause Trouble Later
A few common painting habits can turn a straightforward project into a frustrating one.
- Using the wrong roller: Short fibres may struggle to cover deep grooves, leaving the wall looking patchy.
- Skipping cleaning: Dust and grease can interfere with adhesion and affect the finish.
- Painting over damp areas: Find and address the cause of moisture before applying paint.
- Choosing a high-sheen finish without testing: Extra reflection can highlight imperfections.
- Applying one thick coat: Heavy application can cause drips and uneven buildup around textured details.
- Rushing the drying process: Applying another coat too soon can compromise the final result.
Think about maintenance before choosing your paint, too. Textured walls can collect dust in their grooves, and some finishes are harder to clean than others. In a busy household, a suitable washable paint can make regular upkeep easier.
If the texture is crumbling, the wall has extensive cracks or moisture keeps returning, deal with the underlying issue first. Paint can improve the appearance of a sound surface, but it won’t repair structural damage or solve a leak.
How Much Paint Will You Need?
Textured walls often use more paint than smooth ones, so a basic wall-area calculation is only the starting point.
Measure the height and width of each wall, multiply them to calculate the area and subtract large windows or doors. Then check the coverage rate printed on your paint tin.
For example, if the total wall area is 40 square metres and the paint covers 12 square metres per litre per coat, the estimate works out to:
- One coat: around 3.3 litres.
- Two coats: around 6.7 litres.
That’s before allowing for deep texture, repairs, waste or extra coverage where the old colour differs significantly from the new one.
Check the manufacturer’s stated coverage and buy an appropriate allowance for your particular surface. If you’re painting several connected rooms, keeping the product and colour consistent can also help the finished walls look more uniform.
Conclusion: A Better Finish Starts With the Wall
A successful Interior Room Painting project starts well before the first roller stroke. Take time to prepare each surface, choose suitable tools and test your paint before committing to the whole room. These simple decisions can help you achieve a consistent finish and avoid unnecessary extra work.
Take the time to prepare each surface, choose a suitable roller and test your paint before committing to the whole room. Those small decisions can save you from uneven coverage and unnecessary extra work.
If you’re refreshing a Sydney property and aren’t sure how to approach different wall finishes, Get in touch with our team to discuss your interior painting project and the best way to achieve the look you’re after.
Frequently Asked Questions
1. What paint works best on textured interior walls?
Choose a quality interior paint that suits the existing coating and the room’s conditions. Consider durability, cleaning requirements and the appearance you want. Always check compatibility with the wall surface.
2. Can I paint textured walls without sanding?
Yes, if the existing paint is sound and the surface is clean. You may still need to sand repaired patches or remove loose material safely. Take extra care with older paint that could contain lead.
3. What roller should I use on rough walls?
A long-nap roller generally works well on deeper textures because it can carry paint into the grooves. Medium-nap rollers may suit lighter textures, while smooth plaster usually needs a shorter nap.
4. Do textured walls always need two coats?
No. Two coats often provide more even coverage, but the result depends on the surface, paint colour and product. Follow the manufacturer’s instructions and assess the wall after the first coat dries.
5. Which paint finish hides imperfections best?
Matte finishes generally reflect less light and can make minor surface imperfections less noticeable. However, proper preparation remains important, particularly when the wall has deep grooves or uneven repairs.
6. Can smooth and textured walls share the same paint colour?
Absolutely. Using the same colour can help connect different spaces while allowing the wall textures to create subtle variation. Test the colour on each surface because lighting and shadows can affect how it looks.
7. How should I prepare textured walls before painting?
Clean the surface, let it dry, repair damaged areas and investigate any signs of moisture. Use a compatible primer when necessary and follow the preparation instructions for your chosen paint.